Perfectly Crispy Rice: The Ultimate Guide to Achieving Golden, Crunchy Rice Every Time
Table of Contents
Meta Description
Discover the secrets to making irresistibly crispy rice at home with our foolproof method. Learn techniques from Persian tahdig to Korean nurungji, plus creative variations to elevate your next meal. Perfect for both beginners and culinary enthusiasts!
Have you ever found yourself craving that golden, crunchy layer of rice that forms at the bottom of the pot? That crispy texture that offers the perfect contrast to fluffy grains above? You’re not alone. Across cultures, from Persian tahdig to Korean nurungji, crispy rice isn’t just a happy accident—it’s a culinary treasure worth mastering.
In this comprehensive guide, I’ll walk you through everything you need to know about creating perfectly crispy rice at home. Whether you’re looking to impress dinner guests or simply elevate your weeknight meals, these techniques will transform an everyday staple into something truly special.
What Makes Rice Crispy?
Before diving into methods, let’s understand the science. Crispy rice occurs when rice grains come into contact with hot oil or butter and a heated surface. The starch in the rice caramelizes, creating that distinctive golden crunch we crave. It’s a beautiful example of the Maillard reaction—the same process that gives bread its crust and steak its sear.
The magic happens when moisture evaporates from the rice’s surface while maintaining the right level of pressure and heat. Too little heat, and you’ll never achieve crispness; too much, and you’ll find yourself with burnt rice instead of that sought-after golden crunch.
Essential Ingredients for Perfect Crispy Rice
Achieving the ideal crispy rice doesn’t require fancy ingredients. Here’s what you’ll need:
- Rice: Long-grain varieties like Basmati or Jasmine work beautifully, though short-grain rice can also create excellent results with slight adjustments
- Oil or butter: Provides the fat necessary for proper crisping (use ghee for authentic Persian flavor)
- Salt: Enhances flavor while helping draw out moisture
- Water: For cooking the rice initially
- Optional aromatics: Saffron, turmeric, garlic, herbs, or spices to infuse flavor
The Basic Crispy Rice Method
Let’s start with a foundational technique that can be adapted to various styles and preferences:
Step 1: Prepare Your Rice
Begin by rinsing your rice thoroughly until the water runs clear. This removes excess starch that could prevent proper crisping. For long-grain varieties, soak the rice for 30 minutes, then drain completely. This helps ensure even cooking.
Step 2: Par-Cook Your Rice
In a large pot, bring water to a boil (use a 2:1 water-to-rice ratio). Add salt, then your drained rice. Reduce to a simmer and cook until the rice is about 80% done—still slightly firm in the center but not crunchy. This typically takes 5-7 minutes.
Drain the rice in a colander and rinse with cool water to stop the cooking process. This par-cooking approach ensures the rice will finish cooking while developing its crispy bottom.
Step 3: Prepare Your Pan
Choose a heavy-bottomed pan with a tight-fitting lid. Non-stick works well for beginners, but seasoned cooks often prefer stainless steel or cast iron for superior crisping.
Heat 3 tablespoons of oil or butter in your pan over medium heat. For extra flavor, add a pinch of turmeric or saffron to the oil.
Step 4: Layer and Cook
Once your oil is hot (but not smoking), carefully add your par-cooked rice to the pan. Use a spatula to gently shape it into an even layer, but don’t press down too firmly—you want some air pockets for steam to escape.
Wrap the pan lid in a clean kitchen towel (to absorb condensation) and cover the pan. Reduce heat to low and cook for 25-30 minutes. Resist the urge to peek! Maintaining consistent heat and pressure is crucial.
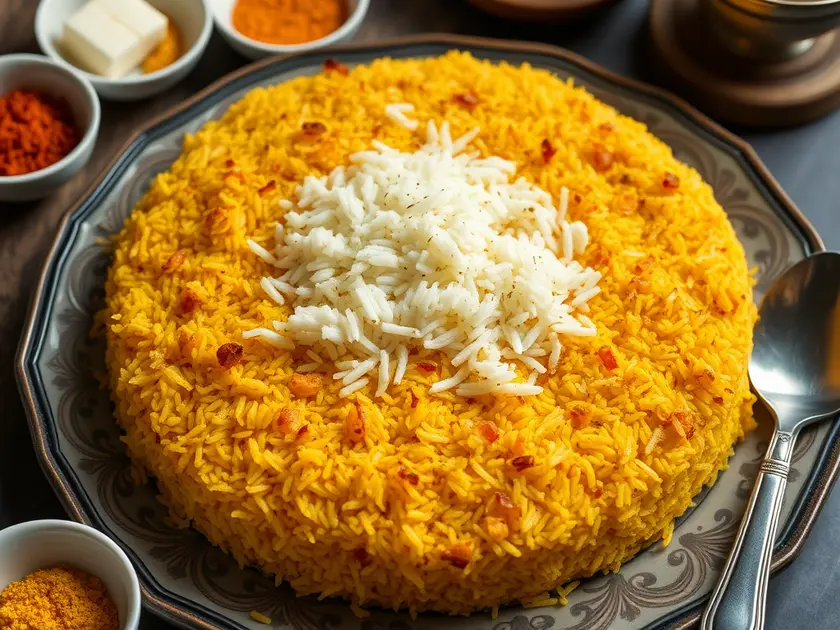
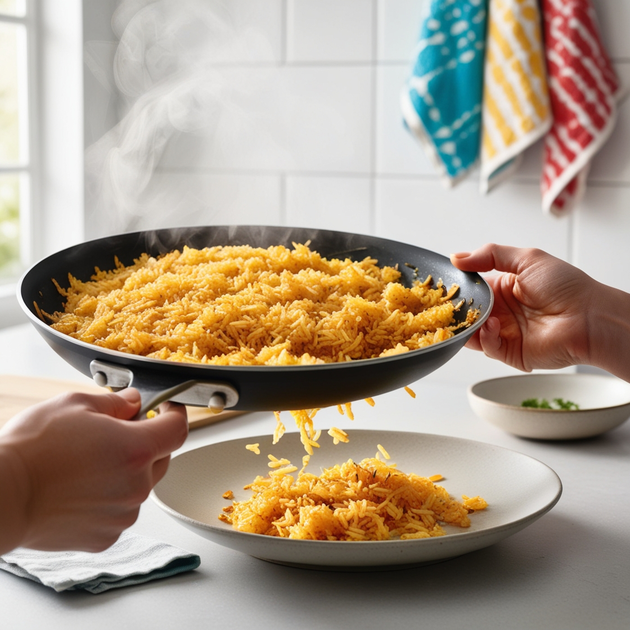
Step 5: The Reveal
After cooking, remove from heat and let stand for 5 minutes. Then place a large serving platter over the pan and, using oven mitts, carefully flip the entire pan to reveal your golden creation. If done correctly, you’ll have a beautiful disc of crispy rice that can be broken into pieces and served.
Cultural Variations on Crispy Rice
What makes crispy rice truly fascinating is how different cultures have developed their own techniques and traditions around this simple yet sublime dish.
Persian Tahdig
Often considered the gold standard of crispy rice, tahdig (which translates to “bottom of the pot”) is the prized crust from Persian rice dishes. Traditional tahdig often incorporates a layer of lavash bread or potato slices at the bottom for extra crispness.
To make authentic tahdig, add a tablespoon of yogurt and a pinch of saffron to your oil before adding the rice. The yogurt helps create an even more pronounced crust, while saffron imparts its distinctive golden color and aroma.
Korean Nurungji
In Korean cuisine, the crispy rice that forms at the bottom of stone rice bowls is called nurungji. Traditionally, hot water is poured over these crispy bits to make a comforting tea-like drink.
For homemade nurungji, use short-grain rice and cook it completely before spreading a thin layer in a well-oiled pan. Cook over low heat until the bottom develops a golden crust.
Chinese Claypot Rice (Bo Zai Fan)
This technique involves cooking rice in a clay pot with various toppings. As the rice cooks, the bottom layer caramelizes against the hot clay surface.
To recreate this at home without a claypot, use a heavy Dutch oven and allow the rice to cook undisturbed for the final 10-15 minutes over low heat until the bottom develops a crisp texture.
Spanish Socarrat
The prized crispy bottom layer of paella, socarrat develops when the broth reduces completely, allowing the rice to contact the hot paella pan.
To achieve good socarrat, increase the heat to medium-high for the final few minutes of cooking your paella, listening for a gentle crackling sound that indicates the rice is crisping.
Creative Variations to Try
Once you’ve mastered the basic technique, consider these creative ways to elevate your crispy rice:
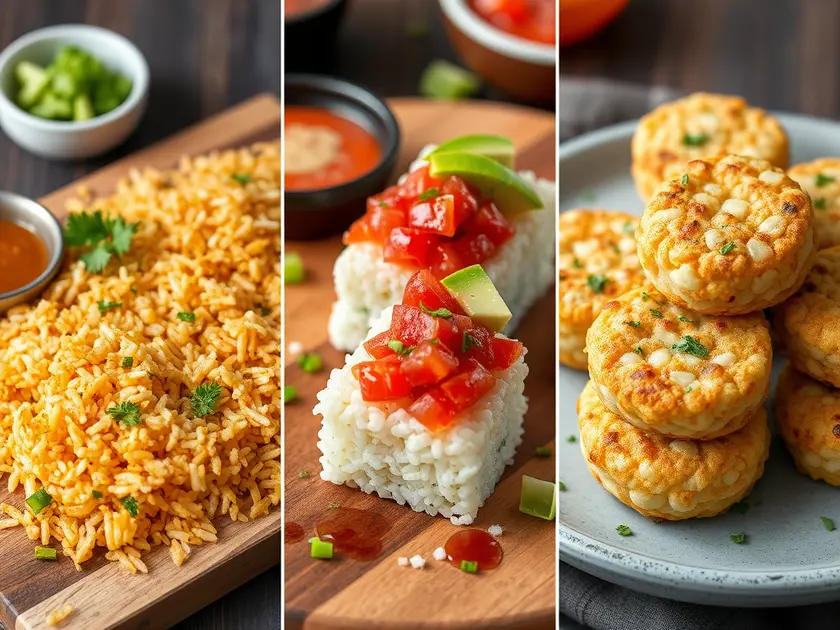
Crispy Rice Sushi Base
For a trendy appetizer, press seasoned sushi rice into a thin layer, chill until firm, then cut into rectangles and pan-fry until crispy. Top with spicy tuna, sliced avocado, and a drizzle of sriracha mayo.
Herbed Crispy Rice
Mix finely chopped herbs (dill, parsley, cilantro) into your rice before crisping for a fragrant, flavorful variation. The herbs will infuse the oil and create beautiful specks of green throughout.
Sweet Crispy Rice
For a dessert version, add a tablespoon of sugar to your rice before crisping, then serve the crispy rice topped with fresh berries and a drizzle of sweetened condensed milk.
Crispy Rice Cakes
Form cold leftover rice into patties, dip in beaten egg, then breadcrumbs, and shallow-fry until golden and crispy on both sides. These make excellent vehicles for various toppings or as a side dish.
Troubleshooting Common Issues
Even experienced cooks sometimes encounter challenges when making crispy rice. Here are solutions to common problems:
Rice Won’t Crisp Properly
- Issue: Not enough oil or uneven heat distribution
- Solution: Ensure you’re using enough oil (at least 3 tablespoons for a standard pan) and that your heat is consistent. A heavy-bottomed pan helps tremendously.
Rice Burns Before Crisping
- Issue: Heat too high or cooking too long
- Solution: Lower your heat and consider using the par-cooking method to ensure the rice can crisp without burning.
Crispy Layer Sticks to Pan
- Issue: Pan not properly oiled or rice disturbed during cooking
- Solution: Be generous with oil and avoid the temptation to stir or check the rice frequently.
Rice Too Mushy
- Issue: Too much water or overcooked initial rice
- Solution: Make sure to drain par-cooked rice well and use the correct rice-to-water ratio.
Health Considerations
While traditional crispy rice recipes use generous amounts of oil or butter, there are ways to create a healthier version without sacrificing too much flavor or texture:
- Use a high-quality non-stick pan to reduce the amount of oil needed
- Try heart-healthy oils like olive or avocado oil
- Include nutrient-dense additions like turmeric, which has anti-inflammatory properties
- Balance your meal by serving crispy rice with plenty of vegetables and lean proteins
Remember that the crispy portion can be served as a special treat atop a larger portion of normally-cooked rice, letting everyone enjoy the texture contrast without consuming too much oil.
Frequently Asked Questions
What type of rice works best for crispy rice?
Long-grain varieties like Basmati or Jasmine generally work best because they’re less sticky. However, short-grain rice can also work well, especially for Korean and Japanese-style crispy rice dishes. The key is adjusting the cooking method to suit the rice type.
Can I make crispy rice in advance?
Yes, but it’s best enjoyed fresh. If making ahead, undercook it slightly, then reheat in a 350°F oven for 10-15 minutes before serving. The crust will re-crisp while the interior warms through.
Is a special pan required for making crispy rice?
While a heavy-bottomed non-stick or well-seasoned cast iron pan works best, any pan with a tight-fitting lid can work. The weight and heat conductivity of the pan do affect results, with heavier pans typically producing more even crisping.
How do I know when my crispy rice is done without looking?
Listen for a subtle sizzling sound, which indicates moisture is being driven off and crisping is occurring. You’ll also often smell a nutty, toasty aroma when the rice is nearly ready.
Can I make crispy rice in a rice cooker?
Some rice cookers have a “crispy rice” function, but for traditional methods, a stovetop gives you more control. If using a rice cooker, let it complete its normal cycle, then switch to “keep warm” for an extended period to develop some crispness at the bottom.
What’s the best way to serve crispy rice?
Traditionally, crispy rice is turned out onto a serving platter, crispy-side up, and broken into pieces at the table. However, you can also serve it directly from the cooking vessel, scraping up the crispy bits and distributing them among serving portions.
Conclusion
Mastering the art of crispy rice opens up a world of culinary possibilities. From the revered Persian tahdig to casual crispy rice bowls topped with fresh vegetables and protein, this technique transforms humble rice into something extraordinary.
Remember that perfect crispy rice requires patience and practice. Don’t be discouraged if your first attempt isn’t perfect—each batch brings you closer to mastery. The keys are quality ingredients, proper heat control, and resisting the urge to disturb the rice while it cooks.
So go ahead—embrace the wonderful world of crispy rice and discover why cultures across the globe have treasured this simple yet magnificent preparation for centuries. Your taste buds (and dinner guests) will thank you.
if you want more dinner recipes click here!!