
The Ultimate authentic Italian pizza dough recipe: Easy, Crispy, and Authentic
There’s something almost magical about pulling a perfectly crisp, bubbly pizza from your own oven. The aroma that fills your kitchen, the anticipation as you slice through that first piece, and that moment when you bite into your creation—these simple pleasures make homemade pizza worth every bit of effort. If you’ve ever searched for the perfect authentic Italian pizza dough recipe, you’re in the right place.

Have you fallen in love with the process of creating homemade pizza but still dream of achieving that perfect, pizzeria-quality crust every single time?
My new ebook, “PIZZA LOVERS GUIDE” takes you beyond basic recipes into the heart and soul of pizza-making. This isn’t just another collection of dough formulas,it’s my personal journey from pizza disasters to dough mastery, carefully documented to save you years of trial and error.
Ready to transform your homemade pizza game forever?
Life’s too short for mediocre pizza. Let’s make some dough magic together!
Table of Contents
My journey with authentic Italian pizza dough recipe began in my grandmother’s kitchen, where she’d let me punch down the risen dough, giggling as the air escaped with a satisfying whoosh. Years later, after countless batches (some admittedly more successful than others), I’m sharing what I’ve learned about creating truly exceptional authentic Italian pizza dough recipe at home.
The Secret Ingredients for Pizza Success
Great pizza starts with great ingredients, and thankfully, you don’t need anything fancy to create magic.
Best Flour for authentic Italian Pizza Dough Recipe
The flour you choose creates the foundation for your pizza’s personality:
Bread flour is my go-to for most homemade pizzas. Its higher protein content (typically 12-14%) develops more gluten, giving you that wonderful chewy texture with beautiful air pockets.
All-purpose flour works perfectly well too! With slightly less protein (10-12%), it creates a more tender crust that’s particularly suitable for thin-crust styles.
“00” flour (doppio zero) is the traditional Italian choice for Neapolitan pizzas. Its superfine texture produces an incredibly light and airy crust with a crisp exterior.
Semolina flour can be mixed with other flours for extra crispness and a slightly nutty flavor. I sometimes add a quarter cup to my dough for texture and that gorgeous golden color on the bottom.
Choosing the Right Yeast
Your yeast choices impact both flavor and convenience:
Active dry yeast needs to be proofed (dissolved in warm water) before using. This traditional approach gives you visual confirmation that your yeast is alive and well.
Instant yeast (or rapid-rise) can be mixed directly with dry ingredients. It’s more convenient and works faster, making it perfect for those “I need pizza tonight” moments.
In my kitchen, I’ve found that active dry yeast produces slightly better flavor when you have time for a longer rise, while instant yeast is my weeknight savior.
Optional Ingredients That Make a Difference
Olive oil adds flavor and creates a more tender, golden crust. For my money, it’s not optional—it’s essential! A good-quality extra virgin olive oil makes a noticeable difference.
Honey or sugar feeds the yeast and promotes browning. Just a teaspoon encourages a beautiful caramelization without making the dough taste sweet.
Salt is non-negotiable. Beyond flavor, it actually strengthens the gluten structure and controls yeast activity for better texture.
How to Make Authentic Italian Pizza Dough Recipe from Scratch
Let me walk you through my foolproof method that works every time:
Basic authentic Italian Pizza Dough Recipe
Ingredients:
- 3½ cups bread flour (or all-purpose)
- 2¼ teaspoons active dry yeast (1 packet)
- 2 teaspoons salt
- 1 teaspoon honey or sugar
- 2 tablespoons olive oil
- 1⅓ cups warm water (about 110°F)
Step-by-Step Method (how to make authentic Italian pizza dough recipe)
- Activate the yeast: In a large bowl, combine warm water with honey and yeast. Let it sit for 5-10 minutes until foamy. This tells you your yeast is alive and ready to work its magic.
- Mix the dough: Add olive oil to the yeast mixture. In a separate bowl, whisk together flour and salt, then gradually incorporate into the wet ingredients, mixing until a shaggy dough forms.
- Kneading time: Turn the dough onto a floured surface and knead for 7-10 minutes. This is my favorite part—there’s something meditative about feeling the dough transform from sticky to smooth and elastic under your hands. The dough is ready when you can stretch a small piece thinly enough to see light through it (the “windowpane test”).
- First rise: Place dough in an oiled bowl, cover with a damp cloth or plastic wrap, and let rise in a warm spot until doubled—about 1-2 hours. My secret spot is my oven with just the light turned on.
- Divide and shape: Gently punch down the dough and divide into 2-3 balls (depending on your desired pizza size). Shape each into a tight ball by tucking edges underneath.
- Second rise: Let the dough balls rest, covered, for another 30-60 minutes. This develops flavor and makes shaping easier.
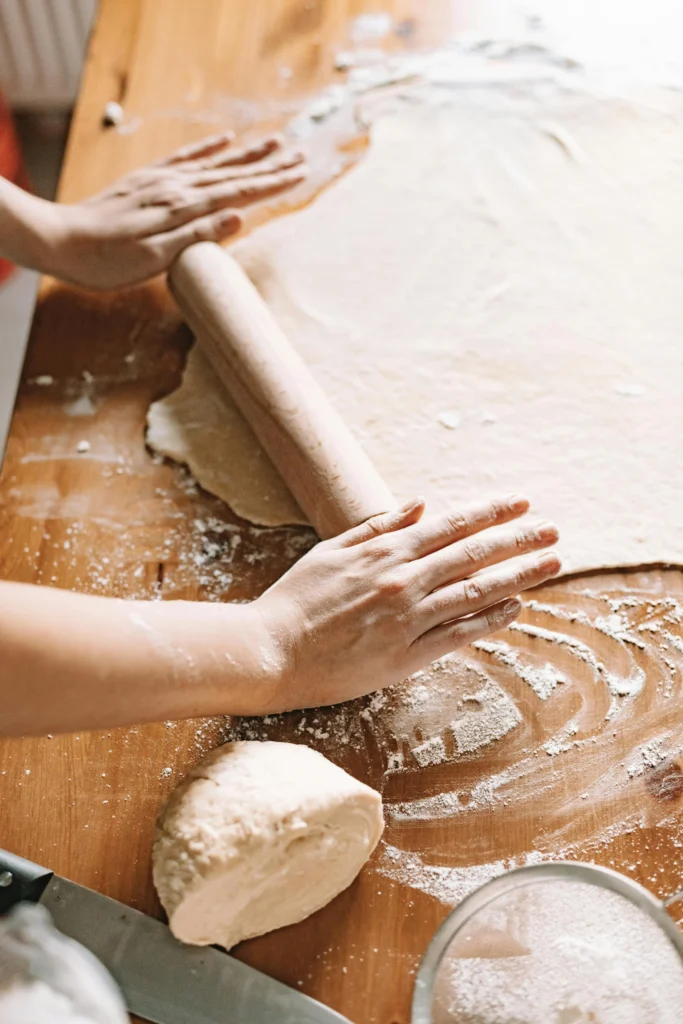
- Shape your pizza: When ready to bake, stretch or roll your dough on a floured surface. For hand-stretching (my preferred method), use your knuckles and gravity to gently stretch the dough, rotating as you go.
Kneading and Rising: Where the Magic Happens
Kneading tips: Use the heels of your hands to push the dough away, then fold it back toward you. Rotate a quarter turn and repeat. Too much flour during kneading can make your crust tough, so add sparingly.
Rising wisdom: Longer rises at cooler temperatures develop more flavor. If time allows, let your dough rise slowly in the refrigerator overnight. The next day, you’ll have dough with incredible depth of flavor.
Rolling pin vs. hand-stretching: Rolling pins work well for thin, crispy crusts, but they can deflate those lovely air bubbles. For a more artisanal crust with varying texture, I prefer hand-stretching. If the dough keeps shrinking back, let it rest for 10 minutes to relax the gluten.
Delicious Variations to Try
No-Yeast Pizza Dough
When you’re in a hurry or out of yeast:
- Replace yeast with 2 teaspoons baking powder and 1 teaspoon baking soda
- Add 2 tablespoons of yogurt or sour cream for tenderness
- Reduce rising time to just 30 minutes of rest before shaping
This version won’t have the same complex flavor but satisfies pizza cravings in a pinch!
Thin Crust vs. Fluffy Pizza Crust
For thin crust: Use less yeast (about 1½ teaspoons), minimal kneading, and roll the dough thin. A higher oven temperature (500°F+) creates that cracker-like crispness.
For fluffy crust: Increase yeast slightly (2½ teaspoons), allow a longer rise time, and shape with a thicker edge. Brush the rim with olive oil before baking for a golden finish.
Overnight Pizza Dough
This is my weekend special:
- Make the dough with cold water and just ¼ teaspoon yeast
- After minimal kneading, place it in the refrigerator for 24-72 hours
- The slow fermentation creates incredible flavor complexity and better texture
Gluten-Free Options
For those avoiding gluten:
- Use a quality gluten-free flour blend with xanthan gum
- Add an extra tablespoon of olive oil for flexibility
- Consider adding a tablespoon of psyllium husk powder for better structure
Baking Tips for the Perfect Crust
The final step is where many homemade pizzas fall short. Let’s make sure yours doesn’t!
Setting Up for Success
Preheating is crucial: Turn your oven to its highest setting (usually 500-550°F) and preheat for at least 30 minutes. This isn’t excessive—it ensures your pizza begins cooking immediately.
Pizza stone magic: If you have a pizza stone or steel, place it in the oven during preheating. These tools retain and conduct heat brilliantly, mimicking the conditions of professional pizza ovens.
No stone? No problem: A turned-over baking sheet preheated in your oven works surprisingly well as an alternative.

Getting That Crispy Texture
Cornmeal or semolina sprinkled on your peel or baking sheet prevents sticking and adds a pleasant crunch.
Par-bake thick crusts: For thicker pizzas, consider baking the crust for 3-4 minutes before adding toppings to prevent soggy centers.
Minimize wet toppings: Drain canned ingredients well and use fresh mozzarella sparingly (or pre-dry slices on paper towels).
The finishing touch: A drizzle of good olive oil right after baking adds flavor and beautiful sheen.
Baking Times for Different Styles
- Thin crust: 7-10 minutes at 500°F
- Medium crust: 12-15 minutes at 475°F
- Thick/pan pizza: 15-20 minutes at 450°F
Always look for golden-brown edges and a firm bottom that doesn’t sag when lifted.
Common Mistakes to Avoid
Even experienced dough-makers hit snags sometimes. Here’s how to troubleshoot:
Why Pizza Dough Doesn’t Rise
- Old yeast: Test yeast before using by proofing in warm water with a pinch of sugar. If it doesn’t foam after 10 minutes, replace it.
- Water temperature: Too hot kills yeast (above 130°F), too cold makes it sluggish.
- Cold environment: Find a warm spot or create one by turning on your oven light.
Texture Troubles
- Too much flour: Results in dense, tough crust. The dough should feel tacky but not stick to your hands.
- Over-kneading: Creates a tough, chewy texture. When the dough passes the windowpane test, stop!
- Under-kneading: Results in poor structure and flat crust. Give it those full 7-10 minutes of kneading love.
Baking Problems
- Pale, soft crust: Your oven isn’t hot enough or wasn’t preheated sufficiently.
- Burnt edges, raw center: Oven too hot or toppings too thick. Try a slightly lower temperature for longer.
- Soggy middle: Too many wet toppings or dough too thick in the center. Stretch more evenly next time.
Regional Style: New York vs. Neapolitan
New York-Style Pizza Dough
The quintessential fold-able slice:
- Use bread flour for chewiness
- Add 1 tablespoon of sugar and 2 tablespoons of olive oil
- Lower hydration (about 60%) for easier handling
- Stretch thin but not too thin (about ⅛ inch)
- Bake at 475°F for that perfect NY balance of crisp and chew
Traditional Neapolitan Dough
The original pizza perfection:
- “00” flour is traditional
- Higher hydration (around 65%)
- Minimal ingredients (no oil traditionally)
- Super-hot oven (as hot as your home oven goes)
- Extremely thin center with puffed edges
- Ultra-fast cooking time (90 seconds in traditional ovens)
Frequently Asked Questions
Q: What is the best flour to use for authentic Italian pizza dough recipe? A: Bread flour is ideal for a chewy texture, while all-purpose flour works well for thin crusts. For a more authentic pizza dough recipe, try “00” Italian flour. I personally love using a mix of bread flour with a touch of semolina for the perfect balance of chew and crisp.
Q: Can I make pizza dough without yeast? A: Yes! A no-yeast pizza dough recipe is perfect for quick meals. Use baking powder or Greek yogurt to add fluffiness. While it won’t have the same depth of flavor, it still makes a satisfying pizza when you’re in a hurry.
Q: Why isn’t my pizza dough rising? A: This can be due to old yeast, cold room temperature, or not enough proofing time. Make sure your yeast is active and let the dough rest in a warm spot. My grandmother’s trick was to place the covered bowl near (not on) a sunny window.
Q: How long should authentic Italian pizza dough recipe rise? A: Typically, 1–2 hours at room temperature, or overnight in the fridge for more flavor. The dough should roughly double in size. Remember that a longer, slower rise develops better flavor, so don’t rush if you don’t have to!
Q: Can I freeze pizza dough? A: Absolutely! Store it in an airtight bag after the first rise, and thaw it overnight in the fridge before using. I often make a double batch specifically to freeze half for future pizza emergencies.
Have you fallen in love with the process of creating homemade pizza but still dream of achieving that perfect, pizzeria-quality crust every single time?
My new ebook, “PIZZA LOVERS GUIDE” takes you beyond basic recipes into the heart and soul of pizza-making. This isn’t just another collection of dough formulas,it’s my personal journey from pizza disasters to dough mastery, carefully documented to save you years of trial and error.
Ready to transform your homemade pizza game forever?
Life’s too short for mediocre pizza. Let’s make some dough magic together!
I hope this guide helps you create pizza memories in your own kitchen. There’s something deeply satisfying about mastering this ancient craft connecting us across time and space to pizzaiolos throughout history. Whether you’re making a quick weeknight dinner or spending a leisurely weekend perfecting your technique, homemade pizza brings both nourishment and joy.
What’s your favorite pizza style? I’d love to hear about your dough adventures in the comments below!