
🍖 The Ultimate Homemade Lunch Meat Recipe: Your Family’s New Favorite Clean Eating Solution
There’s something magical that happens when you take control of what goes into your family’s food. I’ll never forget the day my daughter came home from school, excitedly telling me about her friend’s “fancy” sandwich. When I realized she was talking about basic deli meat that cost more per pound than premium steak, I knew it was time for a change.
That weekend, I embarked on a culinary adventure that would transform our lunch routine forever. What started as a simple quest to save money became a journey into creating something far superior to anything we could buy at the store. This homemade lunch meat recipe isn’t just about economics – it’s about taking back control of your family’s nutrition while creating memories in the kitchen.

Table of Contents
🌟 Why Homemade Lunch Meat Changes Everything
Traditional store-bought lunch meat often contains preservatives, artificial colors, excessive sodium, and mysterious additives that most of us can’t even pronounce. When you make your own lunch meat at home, you become the quality control manager of your family’s nutrition. You know exactly what’s going into every slice, and more importantly, what’s staying out.
This recipe delivers restaurant-quality results with ingredients you probably already have in your pantry. The texture rivals any premium deli meat, the flavor is completely customizable to your family’s preferences, and the cost savings are remarkable – we’re talking about creating gourmet lunch meat for less than a quarter of what you’d pay at the grocery store.
🛠️ Equipment Needed
Before we dive into this culinary adventure, let’s make sure you have everything needed for success:
• High-powered blender or food processor • Large mixing bowl • Measuring cups and spoons • Food-grade plastic bags or parchment paper • Kitchen twine or rubber bands • Large pot with lid (big enough to hold your shaped roll) • Sharp slicing knife • Cutting board • Refrigerator space for chilling • Optional: Kitchen thermometer for precision cooking
🥚 Ingredients That Make the Magic Happen (Serves 4-6)
The beauty of this lunch meat recipe lies in its simplicity. Each ingredient plays a crucial role in creating that perfect texture and flavor we’re after:
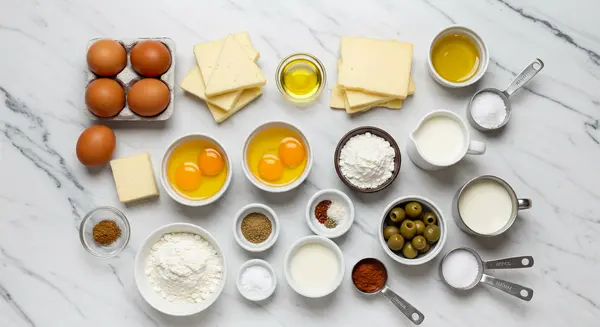
The Foundation: • 4 large eggs (the protein powerhouse that binds everything together) • 1 cup all-purpose flour (120g) (creates the perfect texture) • 3 cheese triangles or 2 tablespoons cream cheese (adds richness and depth)
The Liquid Components: • ½ cup neutral oil (100ml) (ensures moisture and prevents drying) • ½ cup whole milk (100ml) (creates creaminess) • 2 tablespoons cornstarch (the secret to that perfect lunch meat texture)
The Flavor Builders: • 1 stock cube (optional, but recommended for depth) • Salt and freshly ground black pepper to taste • ½ teaspoon ground cumin (adds warmth) • ½ teaspoon sweet paprika (for color and mild flavor) • Pinch of ground nutmeg (the secret ingredient that makes people wonder what makes it so good) • Natural food coloring or turmeric (optional, for that familiar lunch meat appearance) • 5 slices of black or green olives (creates those classic lunch meat spots)
👨🍳 Step-by-Step Mastery: Creating Your Lunch Meat
Step 1: Building the Flavor Base
Start by gathering all your ingredients at room temperature – this ensures better blending and a smoother final texture. In your blender or food processor, combine the eggs, cheese triangles, oil, milk, and cornstarch. Add your stock cube if using, along with all your spices.
Here’s where the magic begins: blend this mixture until it’s completely smooth and creamy, about 2-3 minutes. The mixture should have no lumps and should pour like thick cream. This base is what gives your lunch meat its incredible flavor and texture.
Step 2: The Flour Integration
Gradually add the flour while the blender is running on low speed. This prevents lumps from forming and ensures even distribution. The mixture will thicken considerably – this is exactly what we want. Blend until you achieve a smooth, thick batter that holds together when stirred.
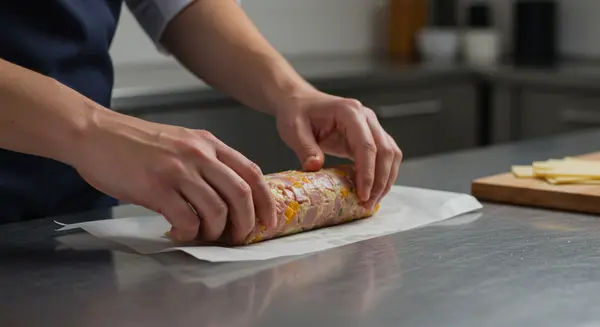
Step 3: Shaping Your Creation
This is where your lunch meat starts taking shape – literally. Pour the mixture into a food-grade plastic bag or onto a large sheet of parchment paper. If using a plastic bag, push out all the air and seal it securely. Shape the mixture into a uniform cylinder about 2-3 inches in diameter.
If using parchment paper, place the mixture in the center and roll it tightly, twisting the ends like a candy wrapper. Secure both ends with kitchen twine or rubber bands, making sure the seal is tight – we don’t want any water getting in during cooking.
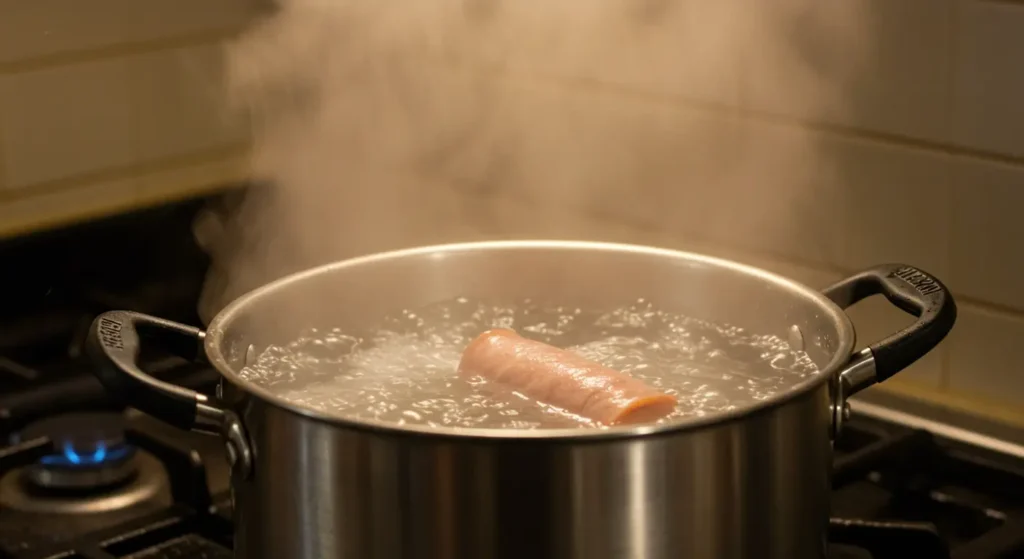
Step 4: The Transformation Process
Bring a large pot of water to a rolling boil. Carefully lower your wrapped lunch meat into the water. Reduce the heat to maintain a gentle boil and cook for exactly 60 minutes. Here’s the crucial part: turn the roll every 15 minutes to ensure even cooking throughout.
During this hour, your kitchen will fill with the most incredible aroma. The proteins are setting, the flavors are melding, and you’re creating something truly special. This slow cooking process is what gives your lunch meat that perfect, sliceable texture.
Step 5: The Final Touch
Remove the cooked roll from the water and let it cool to room temperature on your counter. This cooling process is essential – it allows the proteins to fully set and the flavors to develop. Once cooled, refrigerate for at least 3 hours, though overnight is even better.
When you’re ready to serve, carefully remove the wrapping and slice with a sharp knife. The result? Beautiful, uniform slices that look and taste like premium deli lunch meat.
🎨 Creative Variations to Keep Things Exciting
The Protein Boost Version
Add ½ cup of finely ground cooked chicken breast to your base mixture for extra protein and a more substantial texture. This creates a lunch meat that’s perfect for growing kids or active adults.
Mediterranean Style
Incorporate sun-dried tomatoes, fresh herbs like basil or oregano, and a touch of garlic powder. This variation transports your sandwiches straight to the Mediterranean coast.
Spicy Southwest
Add a pinch of chili powder, smoked paprika, and finely diced jalapeños for a lunch meat with a kick. Perfect for those who like their food with personality.
Garden Fresh
Fold in finely chopped fresh herbs like parsley, chives, or dill just before shaping. This creates beautiful green flecks throughout and adds a fresh, garden taste.
💡 Professional Tips for Lunch Meat Success
Temperature Matters: Room temperature ingredients blend more easily and create a smoother final product. Take your eggs and milk out of the refrigerator 30 minutes before starting.
The Olive Trick: Distribute olive slices evenly throughout the mixture before cooking for that authentic deli meat appearance. Kids love spotting the olives in their sandwiches!
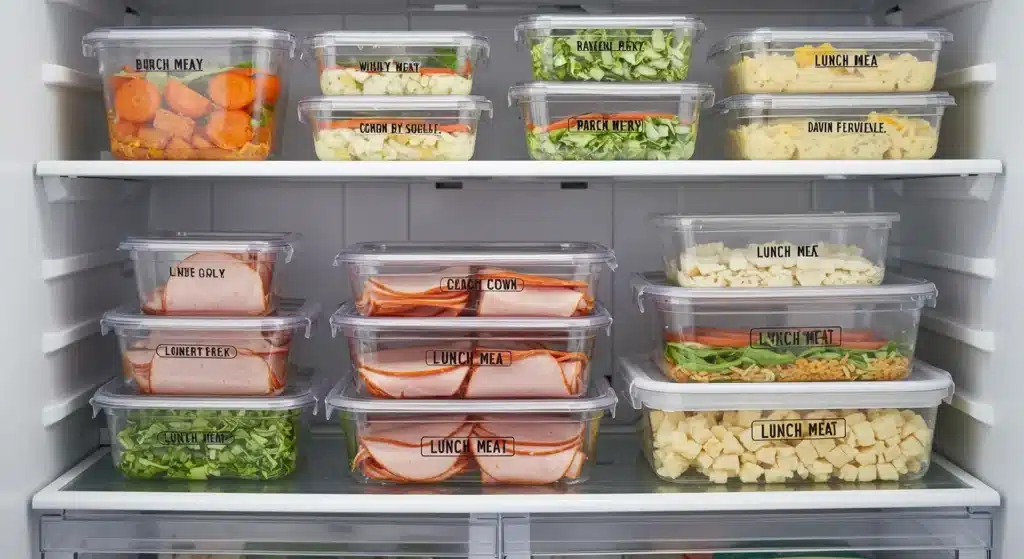
Storage Wisdom: Wrap your finished lunch meat tightly in plastic wrap or store in an airtight container. It stays fresh in the refrigerator for up to 5 days, or you can freeze portions for up to 3 months.
Slicing Success: Use a sharp knife and slice in one smooth motion for clean, professional-looking pieces. A slightly frozen lunch meat actually slices more easily if you’re having trouble.

🏆 Why This Recipe Wins Every Time
Health Benefits That Matter
When you make your own lunch meat, you eliminate preservatives like nitrates and nitrites, reduce sodium content significantly, and avoid artificial colors and flavors. You’re feeding your family real food with ingredients you can pronounce and trust.
Budget-Friendly Excellence
This recipe costs approximately $3 to make and yields the equivalent of $12-15 worth of premium deli meat. That’s savings of 75% or more, without sacrificing quality or taste.
Kid-Approved Nutrition
Children love the mild flavor and familiar texture, making it easy to pack nutritious lunches they’ll actually eat. No more battles over sandwich fillings or wasted food coming home in lunchboxes.
Versatility Champion
Use your homemade lunch meat in sandwiches, wraps, salads, or even as a protein-packed snack. It’s perfect for meal prep and makes weekday lunch preparation effortless.
🍽️ Serving Suggestions That Shine
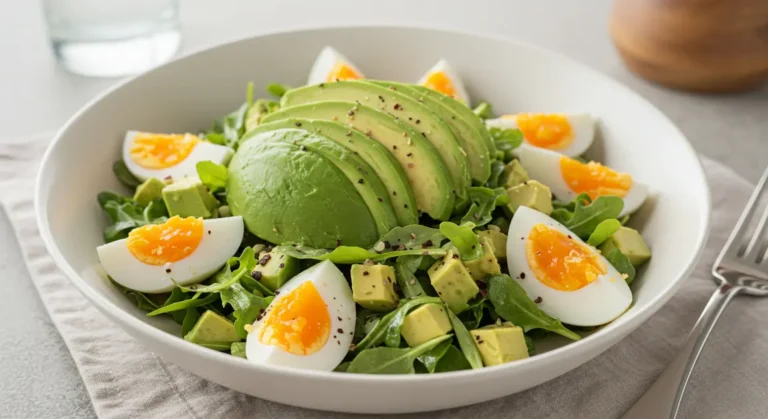
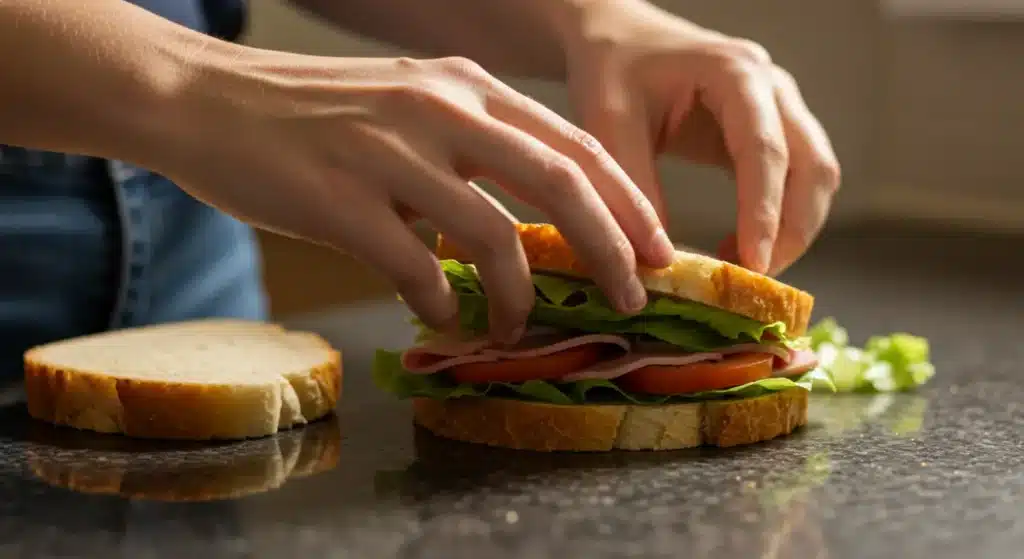
Your homemade lunch meat shines in classic sandwiches with fresh lettuce and tomato, but don’t stop there. Try it cubed in pasta salads, rolled up in tortillas with cream cheese and vegetables, or even pan-fried for a crispy breakfast protein.
For elegant entertaining, serve thin slices on a charcuterie board with artisan crackers and fresh fruit. Your guests will be impressed by the quality and flavor, and you’ll have the satisfaction of knowing you made it yourself.
📦 Storage and Make-Ahead Magic
This lunch meat is perfect for meal prep enthusiasts. Make a double batch on Sunday, slice what you need for the week, and freeze the rest in family-sized portions. Label each package with the date and variety for easy identification.
For optimal freshness, store sliced lunch meat between sheets of parchment paper in an airtight container. This prevents the slices from sticking together while maintaining moisture and flavor.
🌍 A Recipe That Brings Families Together
There’s something special about involving kids in making their own lunch meat. They love helping measure ingredients, watching the transformation during cooking, and especially being part of the slicing process (with supervision, of course). It’s a wonderful way to teach them about real food and cooking skills they’ll use forever.
This recipe has become a weekend tradition in our house. My daughter now requests “mom’s special lunch meat” over any store-bought version, and her friends always want to know what makes her sandwiches so good. It’s these moments that remind me why taking the extra time to make things from scratch is always worth it.
❓ Frequently Asked Questions
Q: Can I make this lunch meat without eggs? A: Eggs are essential for the protein structure that gives this lunch meat its texture. However, you can experiment with egg substitutes like aquafaba (chickpea liquid) or commercial egg replacers, though results may vary.
Q: How long does homemade lunch meat last in the refrigerator? A: When properly stored in an airtight container, your homemade lunch meat stays fresh for 5-7 days in the refrigerator. Always check for any off odors or changes in texture before consuming.
Q: Can I freeze portions of lunch meat? A: Absolutely! Wrap individual portions tightly in plastic wrap and freeze for up to 3 months. Thaw overnight in the refrigerator before slicing and serving.
Q: Is it safe to eat homemade lunch meat during pregnancy? A: Since this lunch meat is fully cooked and you control all ingredients, it’s generally safer than many commercial varieties. However, always consult your healthcare provider about dietary choices during pregnancy.
Q: Can I add vegetables to the mixture? A: Finely chopped vegetables like carrots, peppers, or herbs work well, but avoid vegetables with high water content as they can affect the texture. Always cook any raw vegetables before adding them to the mixture.
Q: What’s the best way to slice lunch meat thinly? A: Use a very sharp knife and slice in one smooth motion. Chilling the lunch meat thoroughly makes it easier to slice. Some people find that partially freezing it for 30 minutes creates the perfect slicing consistency.
Q: Can I make this recipe dairy-free? A: Yes! Substitute the milk with plant-based alternatives, such as almond or oat milk, and use dairy-free cream cheese or nutritional yeast instead of cheese triangles.
Q: Why is my lunch meat crumbly when I slice it? A: This usually indicates overcooking or not enough moisture in the original mixture. Make sure to cook for exactly 60 minutes and ensure your mixture has the proper consistency before shaping.
🎯 Your Next Culinary Adventure Awaits
Making your own lunch meat isn’t just about saving money or eating healthier – it’s about reclaiming the joy of creating something special for your family. Every slice represents care, attention, and love that no store-bought product can match.
This recipe has transformed countless lunch routines and created memories that last far beyond the final bite of the sandwich. It’s given families confidence in their food choices and children an appreciation for real, homemade goodness.
Ready to start your own lunch meat adventure? Gather your ingredients, roll up your sleeves, and prepare to amaze your family with something truly special. Once you taste the difference, you’ll wonder why you ever bought lunch meat from the store.
Your family deserves the best, and now you have the recipe to give it to them. Happy cooking! 🍽️✨
For more recipes, visit us!!!