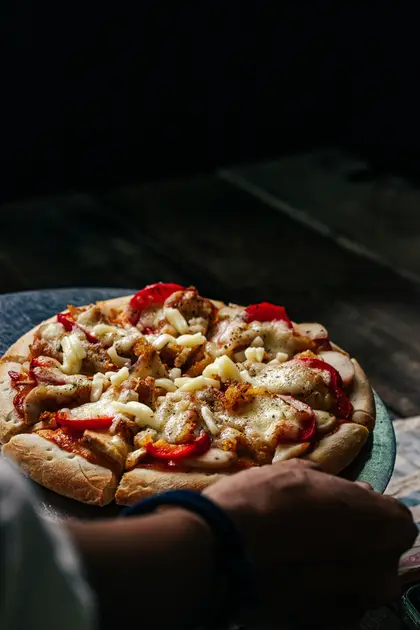
Easy Homemade Mini Pizzas: The Perfect Lunchbox Solution for Busy Parents
Table of Contents
Introduction
As parents, we’re constantly searching for that magical balance: nutritious meals our kids will actually eat, recipes that don’t consume our entire evening to prepare, and options versatile enough to please even the pickiest eaters. If this sounds familiar, you’ve just discovered your new go-to recipe. These homemade mini pizzas have become a staple in our household, transforming lunch-packing from a dreaded chore into a simple task that even gets the kids involved in the kitchen.
What makes these mini pizzas special? They’re perfectly portioned for lunchboxes, can be customized with your child’s favorite toppings, and—perhaps most importantly—they’re made from scratch with ingredients you can feel good about. No more scrutinizing labels on pre-packaged options or compromising between convenience and nutrition. Let me show you how these little rounds of deliciousness can revolutionize your lunch routine.

🍕 Calling All Pizza Lovers! 🍕
Discover the ultimate guide to making mouthwatering pizzas at home! 🔥
From classic Margherita to creative flavor twists, the Pizza Lovers Guide has everything you need — easy recipes, fluffy dough tips, and cheesy perfection in every bite! 🧀🍅
👉 Download now and become your own pizza chef!
📖 Perfect for foodies, families & pizza night fans!
Why Homemade Mini Pizzas Are a Game-Changer
Before diving into the recipe, let’s talk about why these mini pizzas deserve a spot in your meal rotation:
Nutritional Control
When you make pizza from scratch, you control exactly what goes into it. You can opt for whole wheat flour for added fiber, limit the sodium, and load up on vegetable toppings without any preservatives or artificial ingredients found in many store-bought options.
Cost-Effective
A batch of these mini pizzas costs significantly less than pre-made alternatives or school lunch purchases. The basic ingredients are pantry staples that make multiple servings, saving you money in the long run.
Meal-Prep Friendly
These pizzas freeze beautifully, meaning you can make a large batch on the weekend and have lunchbox options ready to go for weeks. Simply reheat in the morning or, for older kids, send them to be reheated at school.
Kid-Approved
There’s something about personal-sized anything that kids love. When they get their own mini pizza (especially one they helped make), lunchtime becomes exciting rather than routine.
The Perfect Mini Pizza Recipe
Let’s get to the heart of the matter—a foolproof recipe that delivers delicious results every time.
Ingredients
For the dough:
- 3 cups all-purpose flour (or mix with whole wheat for added nutrition)
- 1/2 teaspoon salt
- 2 tablespoons sugar
- 1 tablespoon instant yeast
- 2 tablespoons powdered milk
- 1 to 1¼ cups warm water (adjust as needed)
- 2 tablespoons olive oil
For toppings:
- Pizza sauce (homemade or store-bought)
- Fresh tomato pieces
- Green bell pepper, finely diced
- Sliced black olives
- Hot dog slices (optional)
- Shredded mozzarella cheese
- Other optional toppings: mushrooms, spinach, pepperoni, ham, pineapple
Step-by-Step Instructions
Preparing the Perfect Dough
- Combine dry ingredients: In a large mixing bowl, whisk together the flour, salt, sugar, instant yeast, and powdered milk until well combined.
- Add water gradually: Start with 1 cup of warm water (not hot, as this could kill the yeast). Add slowly while stirring until the mixture starts to form a dough. The ideal dough should be slightly sticky but not too wet.
- Add oil and knead: Pour in the 2 tablespoons of olive oil and begin kneading the dough. You can do this by hand on a floured surface for about 5 minutes, or use a stand mixer with a dough hook. The dough should become smooth and elastic.
- Let it rise: Place the dough in an oiled bowl, cover with a clean kitchen towel or plastic wrap, and let it rise in a warm place until doubled in size, usually about 45-60 minutes. The rising time might vary depending on the temperature of your kitchen.
Shaping and Topping Your Mini Pizzas
- Divide the dough: Once risen, gently punch down the dough to release air bubbles. Divide it into approximately 12-16 small balls, depending on how large you want your mini pizzas to be.
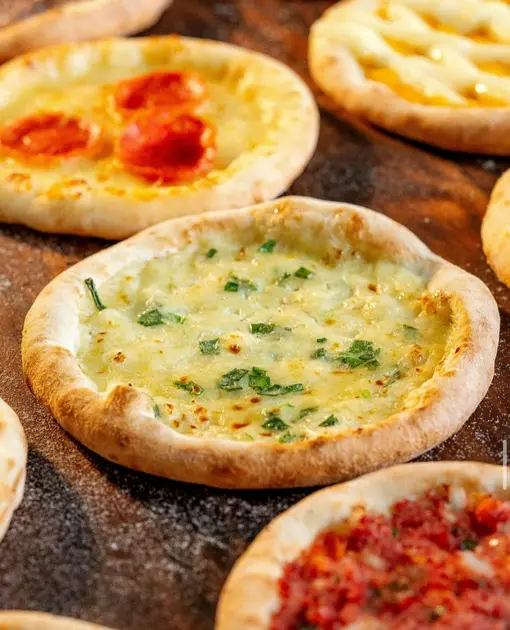
- Shape the crusts: On a floured surface, roll each ball into a small circle about 4-5 inches in diameter. For a traditional pizza look, you can create a slightly raised edge around the perimeter.
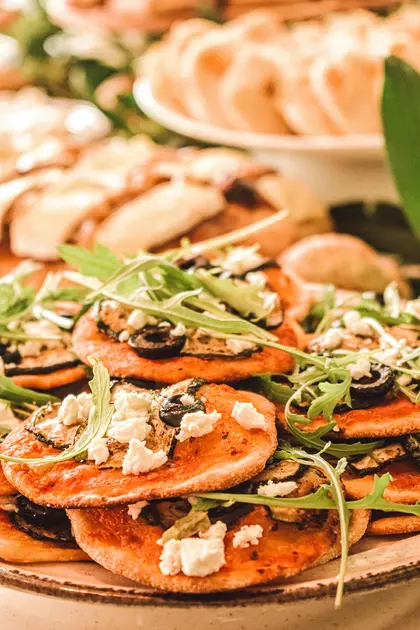
- Add your toppings: Start with a thin layer of pizza sauce, then add your selected toppings. For kid-friendly options, keep it simple with tomatoes, green bell peppers, and olives. The hot dog slices are a fun addition that many children enjoy, but they’re completely optional. Finish with a generous sprinkle of mozzarella cheese.
Baking to Perfection
- Preheat and bake: Make sure your oven is preheated to 200°C (392°F). Place your mini pizzas on a baking sheet lined with parchment paper and bake for 12-15 minutes, or until the cheese is bubbling and the crust edges are golden brown.
- Cool slightly: Allow the pizzas to cool for a few minutes before serving. This helps the cheese set slightly and prevents burned mouths!
Creative Variations for Every Preference
The beauty of this recipe lies in its versatility. Here are some variations to keep lunchtime exciting:
Themed Pizza Days
- Mediterranean Monday: Top with olives, feta cheese, and a sprinkle of oregano
- Taco Tuesday: Use taco-seasoned ground beef, cheddar cheese, and diced tomatoes
- White Pizza Wednesday: Replace pizza sauce with a thin layer of ricotta mixed with garlic and herbs
- BBQ Thursday: Substitute BBQ sauce for pizza sauce and top with chicken and red onions
- Veggie-Loaded Friday: Pack on the colorful vegetables for an end-of-week nutrition boost
Dietary Accommodations
- Gluten-Free: Substitute the all-purpose flour with a gluten-free baking mix designed for yeast recipes
- Dairy-Free: Use dairy-free cheese alternatives and skip the powdered milk in the dough
- Vegetarian/Vegan: Load up on vegetables and use plant-based cheese alternatives
Storage and Reheating Tips
To make the most of your mini pizza batch:
Refrigeration
Freshly baked mini pizzas can be stored in the refrigerator for up to 3 days. Place them in an airtight container with parchment paper between layers to prevent sticking.
Freezing
For longer storage, freeze completely cooled pizzas by:
- Place them on a baking sheet in a single layer until completely frozen (about 2 hours)
- Transfer to freezer bags or containers, separating layers with parchment paper
- Store for up to 2 months
Reheating
For optimal results when reheating:
- From refrigerated: Warm in a 350°F (175°C) oven for 5-7 minutes, or in a microwave for 30 seconds
- From frozen: Bake at 375°F (190°C) for 8-10 minutes, or microwave for 1-2 minutes
Packing for School Lunches
To maintain quality in a lunchbox:
- Allow pizzas to cool completely before packing
- Wrap individually in aluminum foil if you want them to stay warm (pre-warm in the morning)
- For older children with microwave access at school, pack in microwave-safe containers
- Include a small container of marinara sauce for dipping to add extra excitement
Making It a Family Activity
One of the greatest benefits of this recipe is its potential for family involvement. Here’s how to turn pizza-making into quality time:
- Create a topping bar: Set out small bowls with various toppings and let everyone create their own pizza masterpiece
- Pizza design contest: See who can make the most creative pizza face or pattern with toppings
- Teaching opportunity: Use pizza-making to teach measuring, fractions, and following instructions
- Future planning: Have kids help make extra pizzas for their own lunches, giving them ownership over their meals
Health Benefits You Might Not Expect
These homemade mini pizzas aren’t just convenient—they can be nutritionally advantageous too:
- Portion control: The small size naturally limits portions compared to larger pizzas
- Balanced meal potential: When topped with vegetables and served with a side of fruit, these pizzas can hit multiple food groups in one meal
- Reduced sodium: Homemade pizza typically contains significantly less sodium than delivery or frozen options
- Improved ingredients: No artificial preservatives, colors, or flavors when you make it yourself
Conclusion
These easy homemade mini pizzas represent more than just another recipe—they’re a solution to the daily lunchbox dilemma that benefits everyone involved. Children get exciting, tasty lunches they’ll actually eat. Parents gain a cost-effective, nutritious option they can prepare in advance. And families get an opportunity to spend quality time creating food together.
Give this recipe a try this weekend and prepare to be amazed at how something so simple can make such a significant difference in your weekly routine. Your kids will be excited for lunchtime, and you’ll have the satisfaction of knowing exactly what’s in their meal. It’s a winning combination that might just become your new family tradition!
🍕 Calling All Pizza Lovers! 🍕
Discover the ultimate guide to making mouthwatering pizzas at home! 🔥
From classic Margherita to creative flavor twists, the Pizza Lovers Guide has everything you need — easy recipes, fluffy dough tips, and cheesy perfection in every bite! 🧀🍅
👉 Download now and become your own pizza chef!
📖 Perfect for foodies, families & pizza night fans!
FAQs About Homemade Mini Pizzas
Can I make the dough ahead of time?
Yes! You can prepare the dough up to 24 hours in advance and store it in the refrigerator. Allow it to come to room temperature for about 30 minutes before shaping the mini pizzas.
My child doesn’t like vegetables. How can I make these healthier?
Try pureeing vegetables like spinach or carrots into your pizza sauce. The flavor is minimal, but the nutrition remains. You can also try very finely mincing vegetables so they’re less noticeable.
Can I make these without yeast?
You can use a quick bread-style dough with baking powder instead, though the texture will be different. Mix 3 cups flour, 3 teaspoons baking powder, 1 teaspoon salt, and add 1 cup milk and 1/4 cup oil to form a dough.
How can I prevent the pizzas from getting soggy in the lunchbox?
Make sure to let the pizzas cool completely before packing. Additionally, don’t overload with sauce, and consider placing a paper towel under the pizza in the container to absorb any excess moisture.
Are these suitable for children with egg allergies?
Yes! This recipe naturally contains no eggs, making it suitable for children with egg allergies.
What’s the best cheese to use for mini pizzas?
Low-moisture mozzarella is traditional and melts beautifully. For extra flavor, a sprinkle of parmesan on top works wonders. If your child prefers milder cheese, try a mixture of mozzarella and mild cheddar.
My dough didn’t rise properly. What went wrong?
The most common issues are using water that’s too hot (which kills the yeast) or too cold (which doesn’t activate it). Water should feel warm to the touch but not hot. Also check that your yeast is fresh and not expired.
for more lunch recipes click here!!!